

Description
Assembled Sets coming soon!
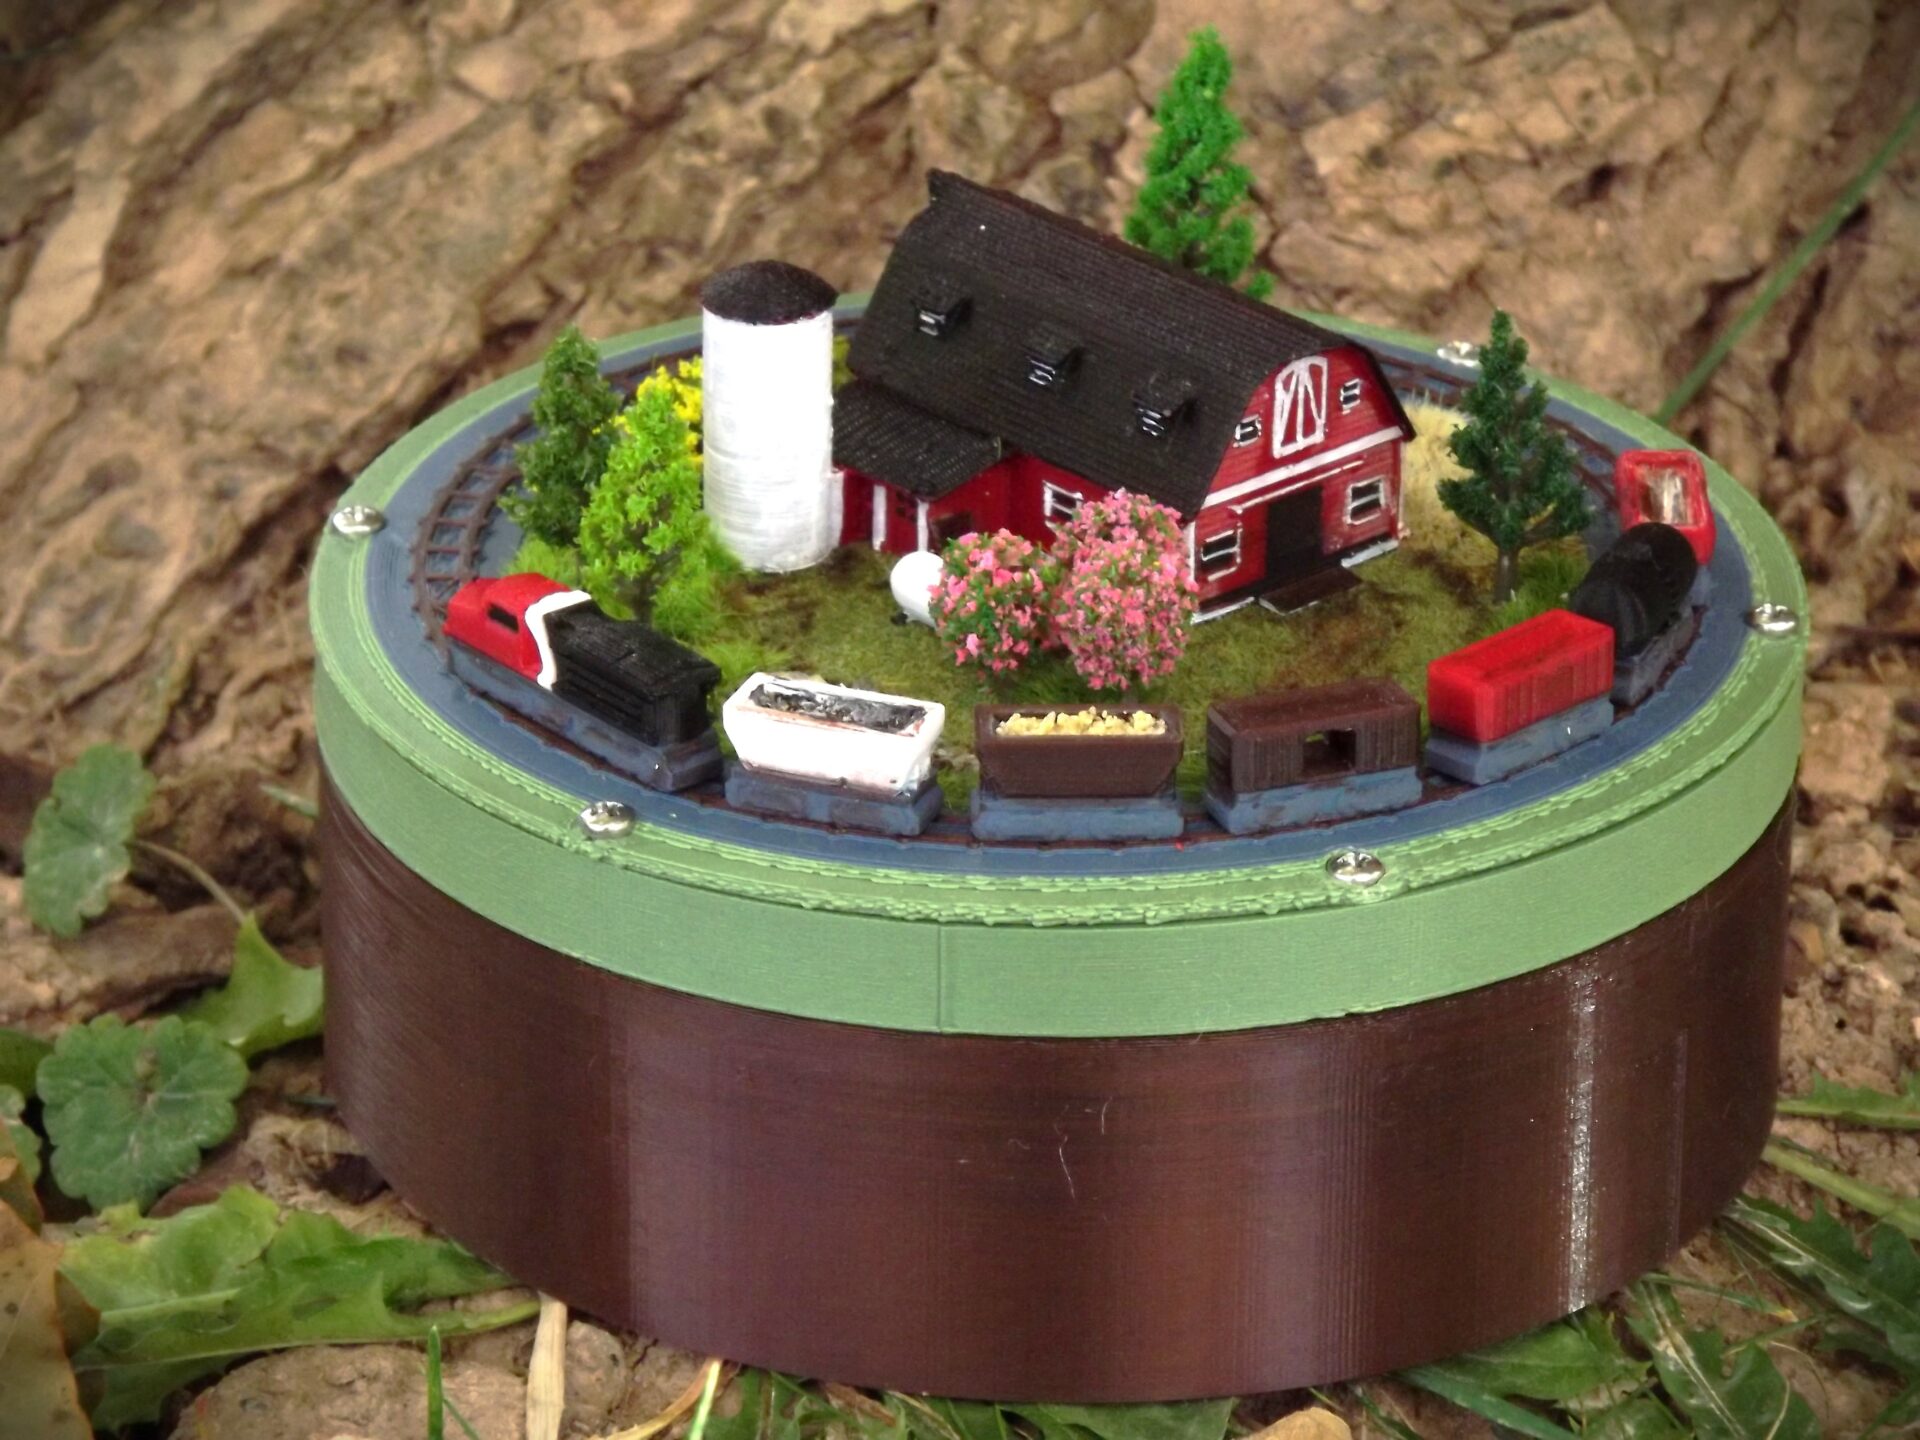
All Aboard the Desktop Express! Thanks for your interest in the PicoRail Pocket Train Set!
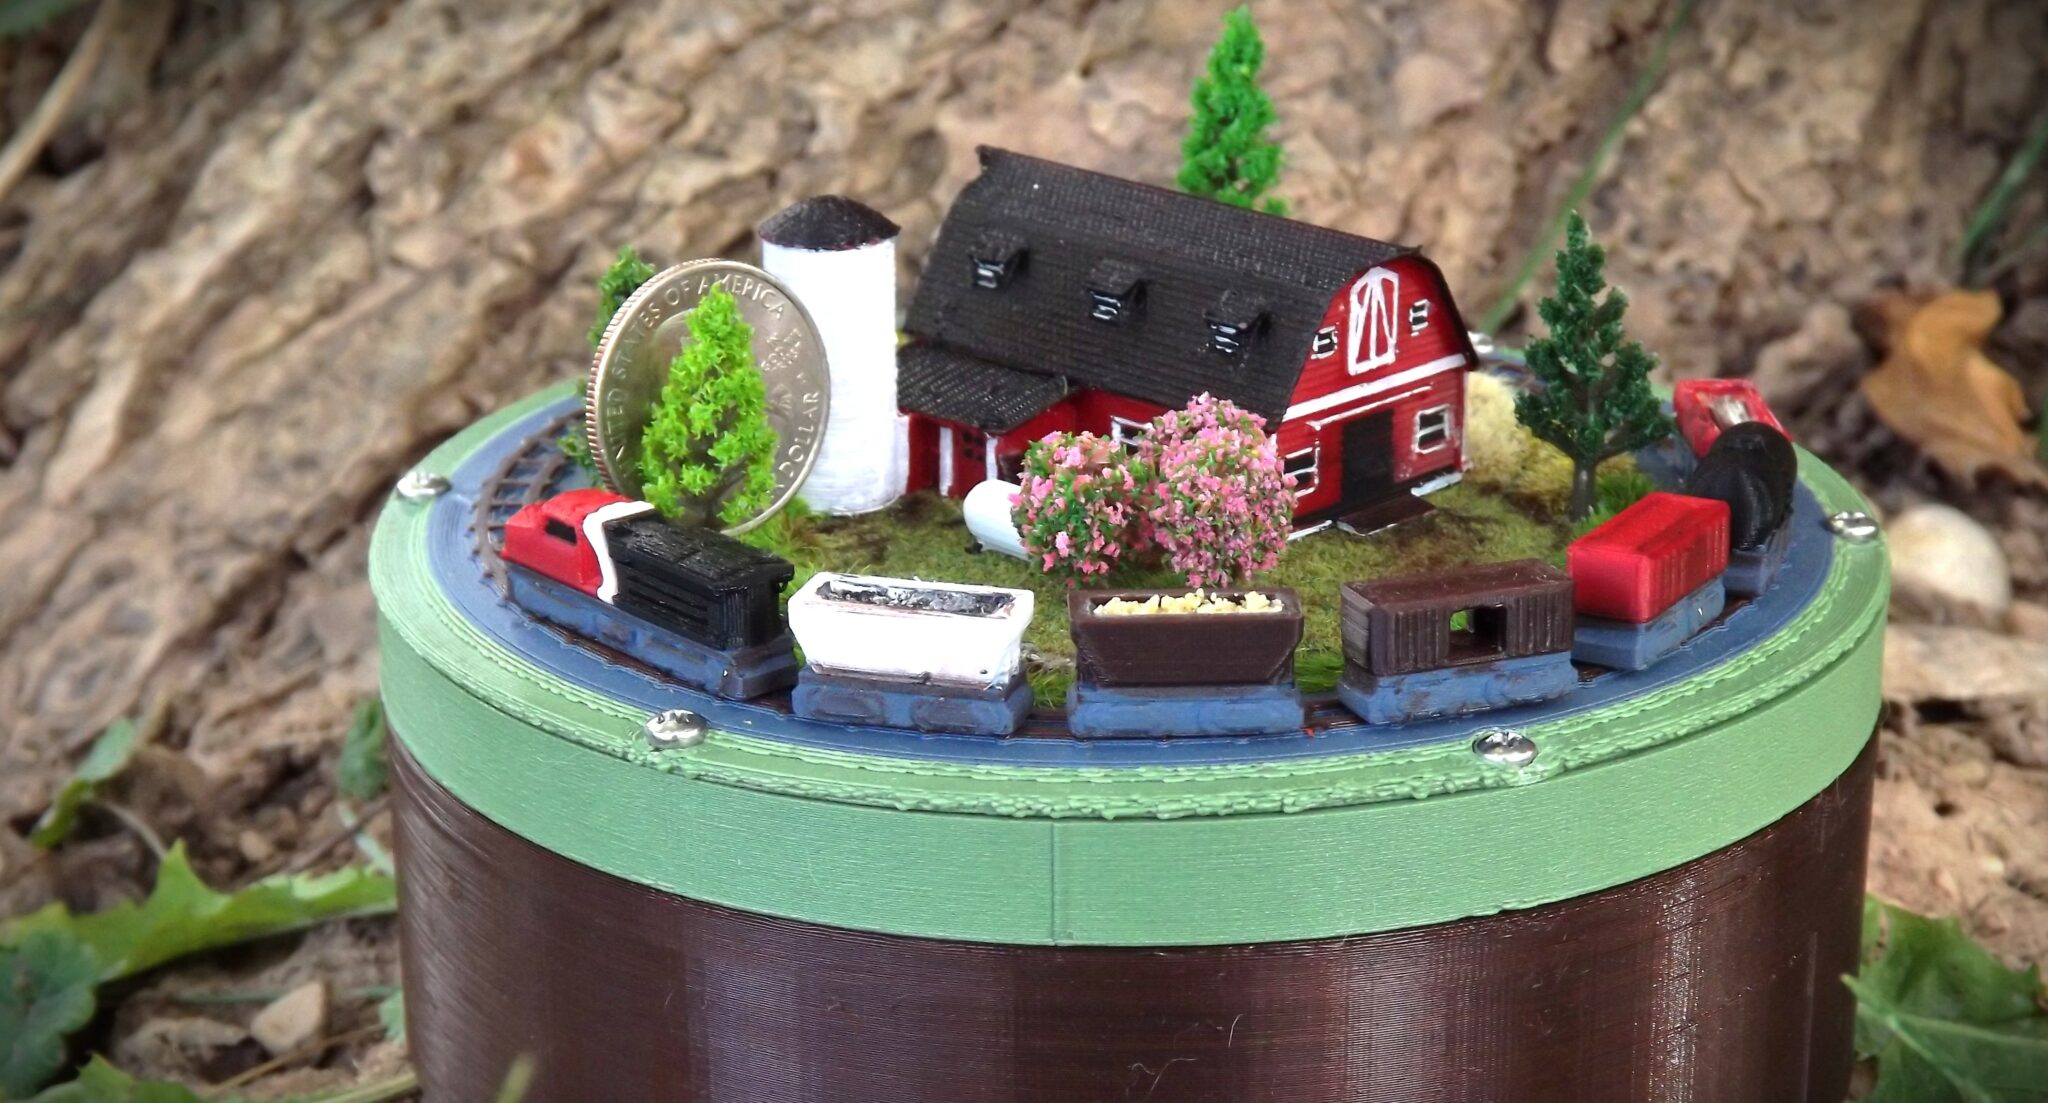
The Train Set that Fits Between your Coffee and Keyboard!
Files available freely below or show your appreciation by using the donation option! It helps fund research and development for future projects 🙂
Resources
Free Download: Pico Rail V1
Demo & Instructional Build Video: https://youtube.com/shorts/EYK5fCTpYso
Barn with Silo Model (As shown in Video): https://www.thingiverse.com/thing:3733451
Parts Selection for Building:
The links below are sponsored promotions through the Amazon Affiliate program. Purchasing parts through these links ensures part compatibility and greatly helps me to fund further products!
Some small parts, such as nuts and bolts may be cheaper to buy as single parts from your local hardware store!
Plastic:
- Black PLA: https://amzn.to/3La2nk5
- Magnet Disk, Base Assembly, Trains
- Matte Green PLA: https://amzn.to/47q7RP1
- Track “Grass” Surface
- Matte Gray PLA: https://amzn.to/4qCnU5i
- Train “Wheels”, Track “Ballast” Surface
- Brown PLA: https://amzn.to/4oF0muu
- Track “Rails” Surface
Electronics, Motors & Hardware
- N20 Gear Motor (3v 50-100rpm): https://amzn.to/47deiGt
- AAA Battery Holder: https://amzn.to/3JivvFl
- M5 x 30mm Bolt and Nuts: https://amzn.to/3X1vZ5M
- M2.5 x 30mm Screws: https://amzn.to/4oLZyo2
- 5x3mm Neodymnium Magnets – https://amzn.to/4hBo9cG
- 5mm x 16mm x 5mm Ball Bearings: https://amzn.to/47tURI6
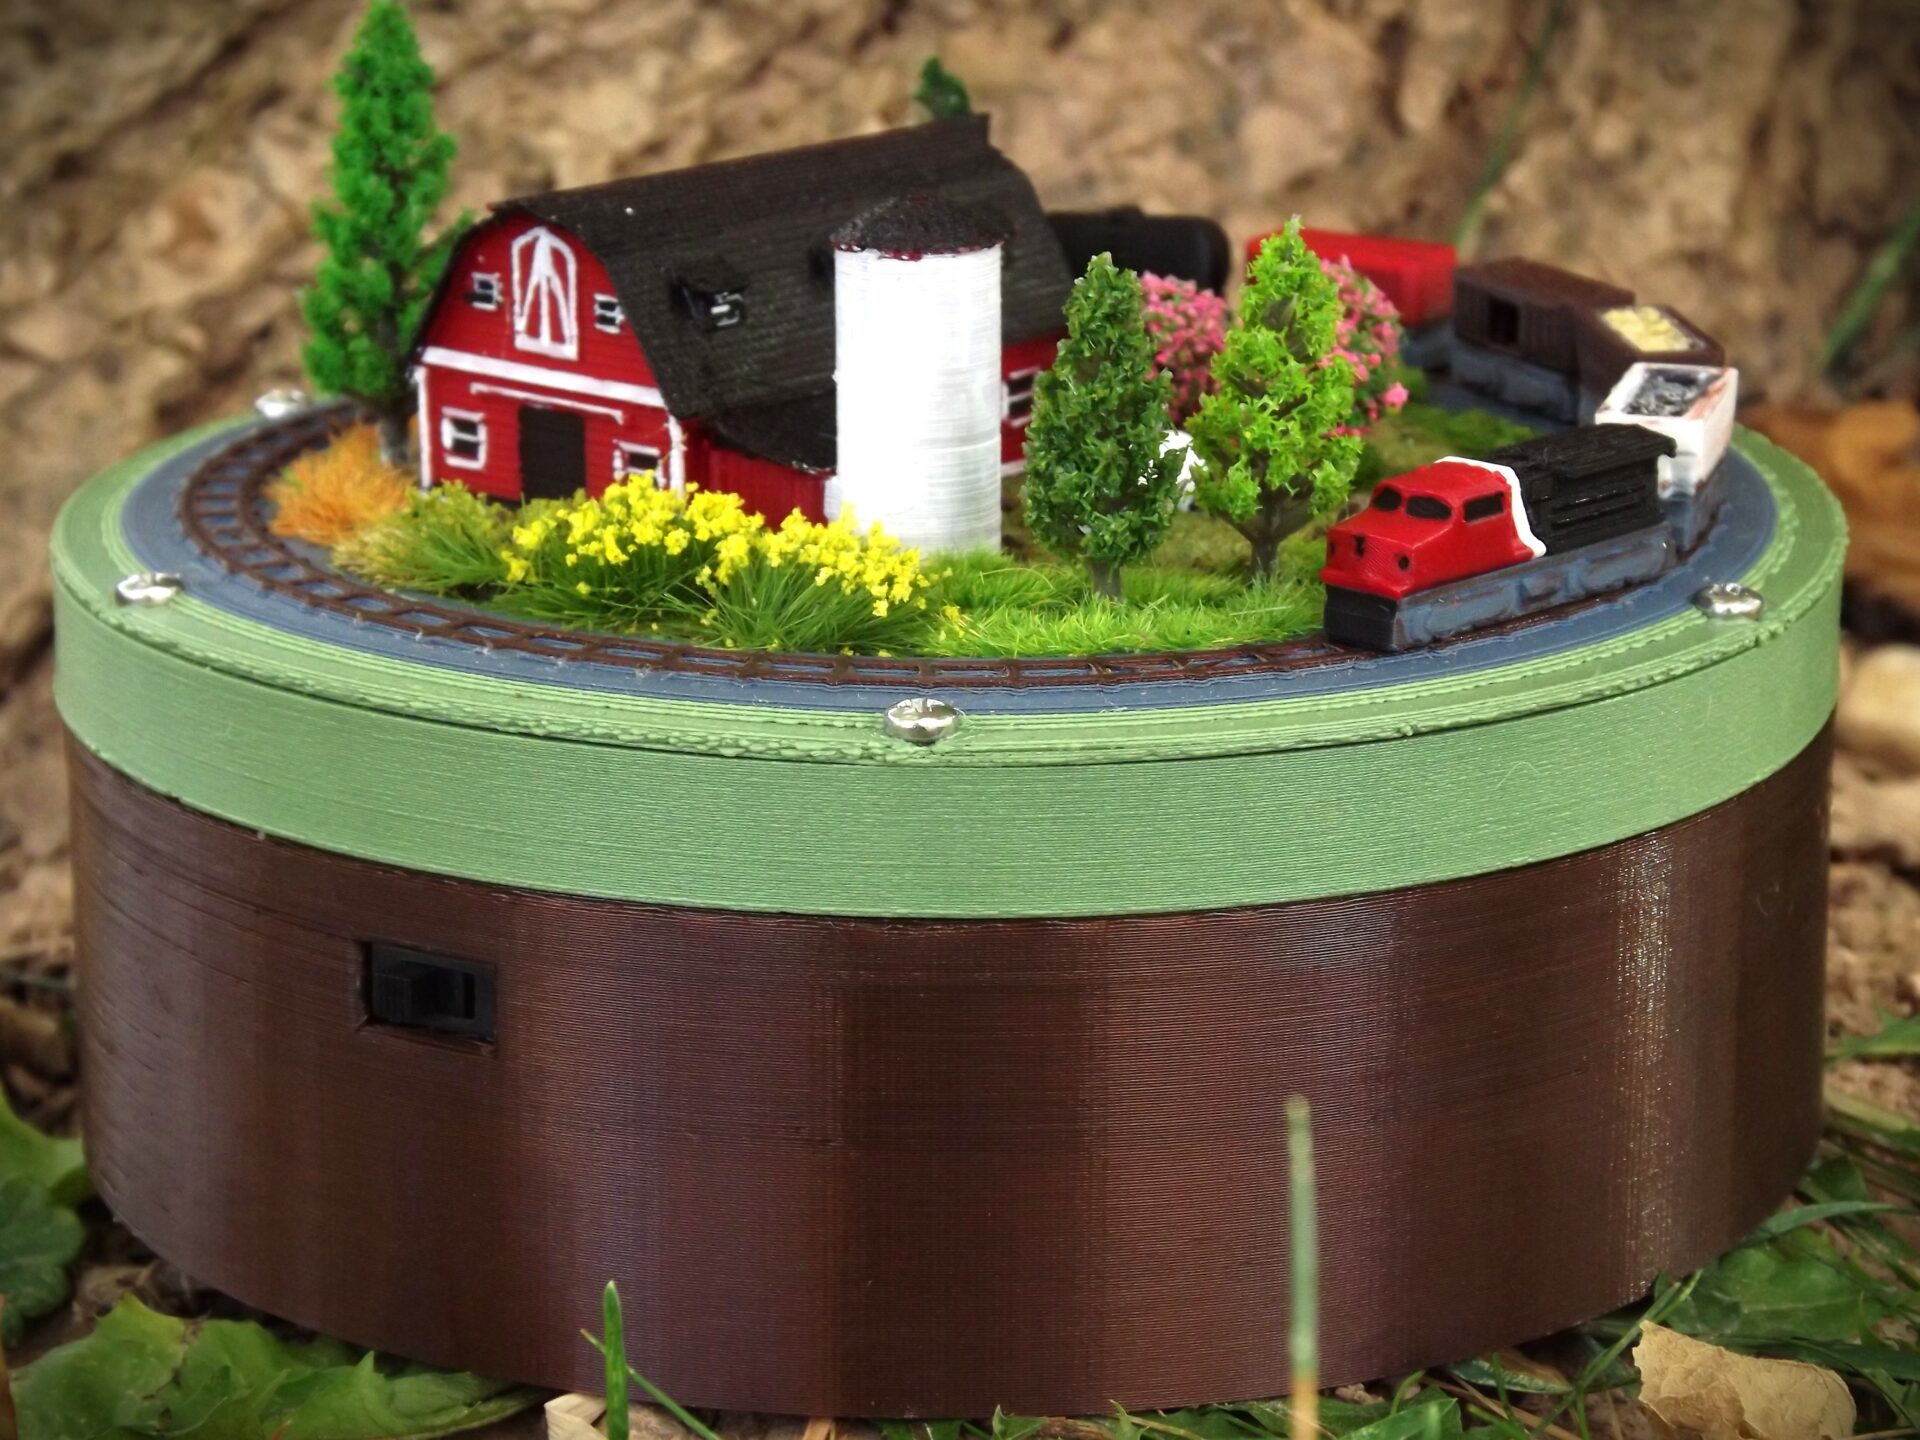
- SPST Switch: https://amzn.to/4oClYYt
Decorations and Scenery
- Fine Tip Paint Markers: https://amzn.to/3JA7oC3
- Model Grass Mat for Track Surface: https://amzn.to/4odmbBC
- Self-Adhesive Grass & Foliage: https://amzn.to/47v817M
- Miniature Trees and Shrubs: https://amzn.to/3Jv56nD
Assembly Guide & Printing
- I print all my parts in generic PLA at a layer height of .1mm on a 0.4mm nozzle.
- Trains are tested to print in Cura 4.13. You may have to play around with temperatures to prevent small details from being lost.
- All parts should be printed in their default orientations.
- To use multiple colors, use Pause at Height in your slicer to swap filament.
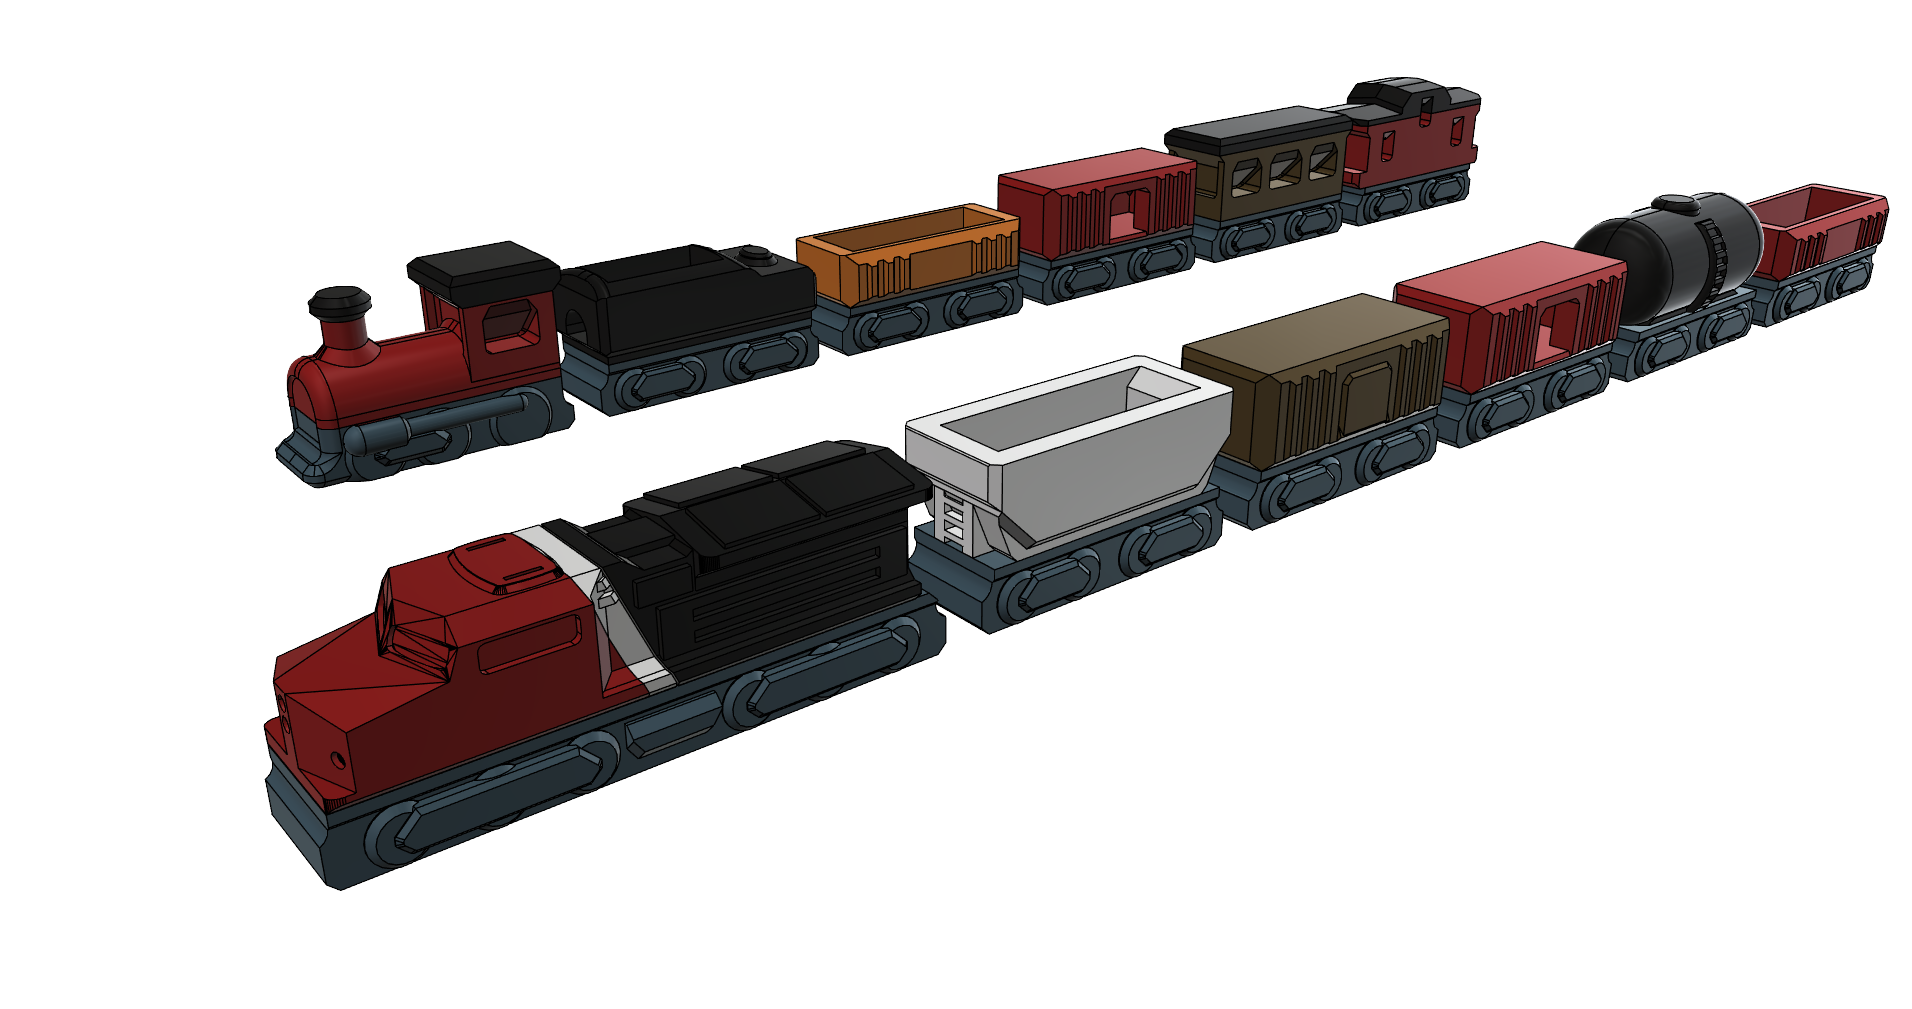
- The Diesel Locomotive has an all-in-one print or a two-piece print that glues together.
- All train cars use the same wheel height which I print in gray before swapping to the color I want the rest of the car to be.
- The track surface may be printed in multiple colors as well. I use green as a grass color for the base of the track, and swap to gray for the “ballast” before finally swapping to a rusty brown for the track surface.
- Do not overtighten the magnet disk axle, as it will bind the operation of the bearings. Just barely snug will do.
- If the motor drive gear / pinion does not mesh well, you can scale it down slightly in the slicer.
- Magnet installation:
- Each of 16 positions on the magnet disk uses a pair of opposing north/south magnets.
- Use the same pattern of north/south across the entire disk!
- Use super glue to secure the magnets, as tolerances are a bit loose.
- I recommend printing a spare train to use as a tool to hold the magnets during assembly (see video).
- The Diesel Engine uses two magnets in the same orientation, as it utilizes two of the 16 disk positions.
- Every other train car uses pairs of opposing north / south magnets.
- The order of north/south on the disk vs the train cars will determine if the trains face clockwise or counterclockwise.
- Each of 16 positions on the magnet disk uses a pair of opposing north/south magnets.
Wiring & Electronics
- The switch is optional but recommended if you don’t want to have to remove the battery.
- The battery holder may be wired directly to the motor terminals if omitting the switch.
- If using a switch, cut the positive wire and solder the switch inline.
- The polarity of the motor determines clockwise or counterclockwise rotation. If your trains go backwards, you may need to swap wires!
Train Car List
Each set includes the following train cars, some not pictured in the demo video:
- Diesel Locomotive (inspired by CN GE Dash 9)
- Steam Locomotive (Cartoonish appearance, simple)
- Coal Tender
- Gondola
- Hopper
- Tank Car
- Box Car (closed)
- Box Car (open)
- Passenger Car
- Caboose