Please subscribe to https://youtube.com/Pilotgeek for more info. Download links for programmer below.
As of this writing, a video is in the works but not yet complete, relating to the process of getting data onto a 20+ year old toy robot. The project itself is complete, however, so I’m sharing what I have. Archive of the original YICT project / programming tools for the I-Cybie are included in the Tools folder, along with a new Powershell script to interface my new Arduino based cartridge programmer.
I now offer a programming service as well: I-Cybie Cartridge Programming
Making The Cartridge
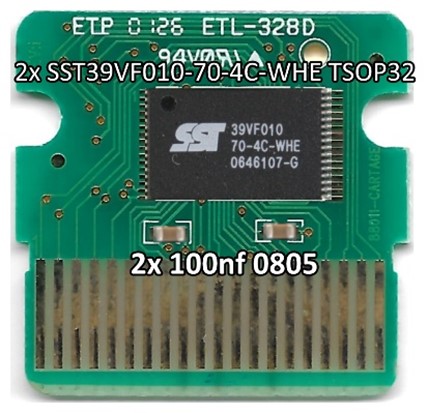
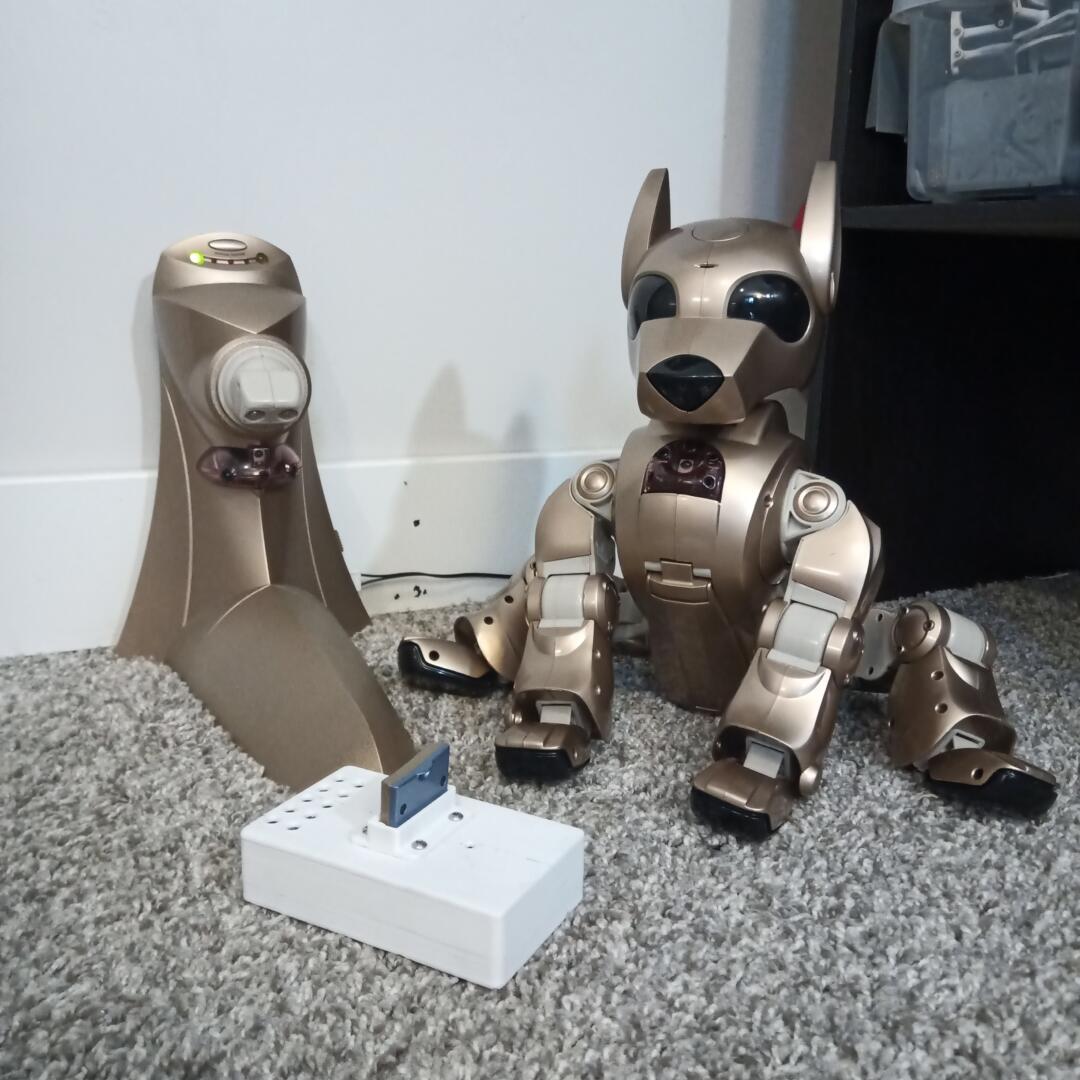
Of course, what good is a programmer if you don’t have a cartridge? Luckily, most i-Cybie’s came with a dummy cartridge with complete traces, just unpopulated. If yours came with totally blank PCB without copper traces, you’re out of luck and will need to source one. Maybe some day I will make a run of new boards if there is demand (there won’t be). All we need to do to make this a working board is to populate it with two surface mount capacitors 100nf 0805 (both on side shown), and two flash memory chips (one on each side).
Making the Programmer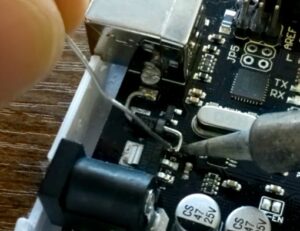
The project uses an Arduino Mega 2560. Because the cartridge requires 3.3v, we need to run the Arduino at 3.3v as well. This basically consists of replacing the AMS1117 with a 3.3v variant, and then removing the USB fuse and replacing it with a diode to route it through the 3.3v regulator. This can be modified using this tutorial: https://learn.adafruit.com/arduino-tips-tricks-and-techniques/3-3v-conversion
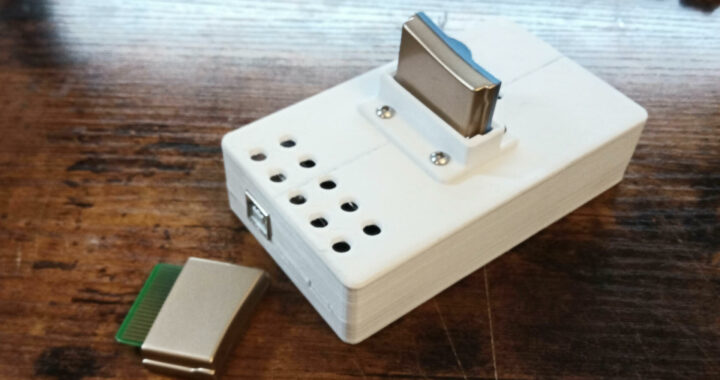
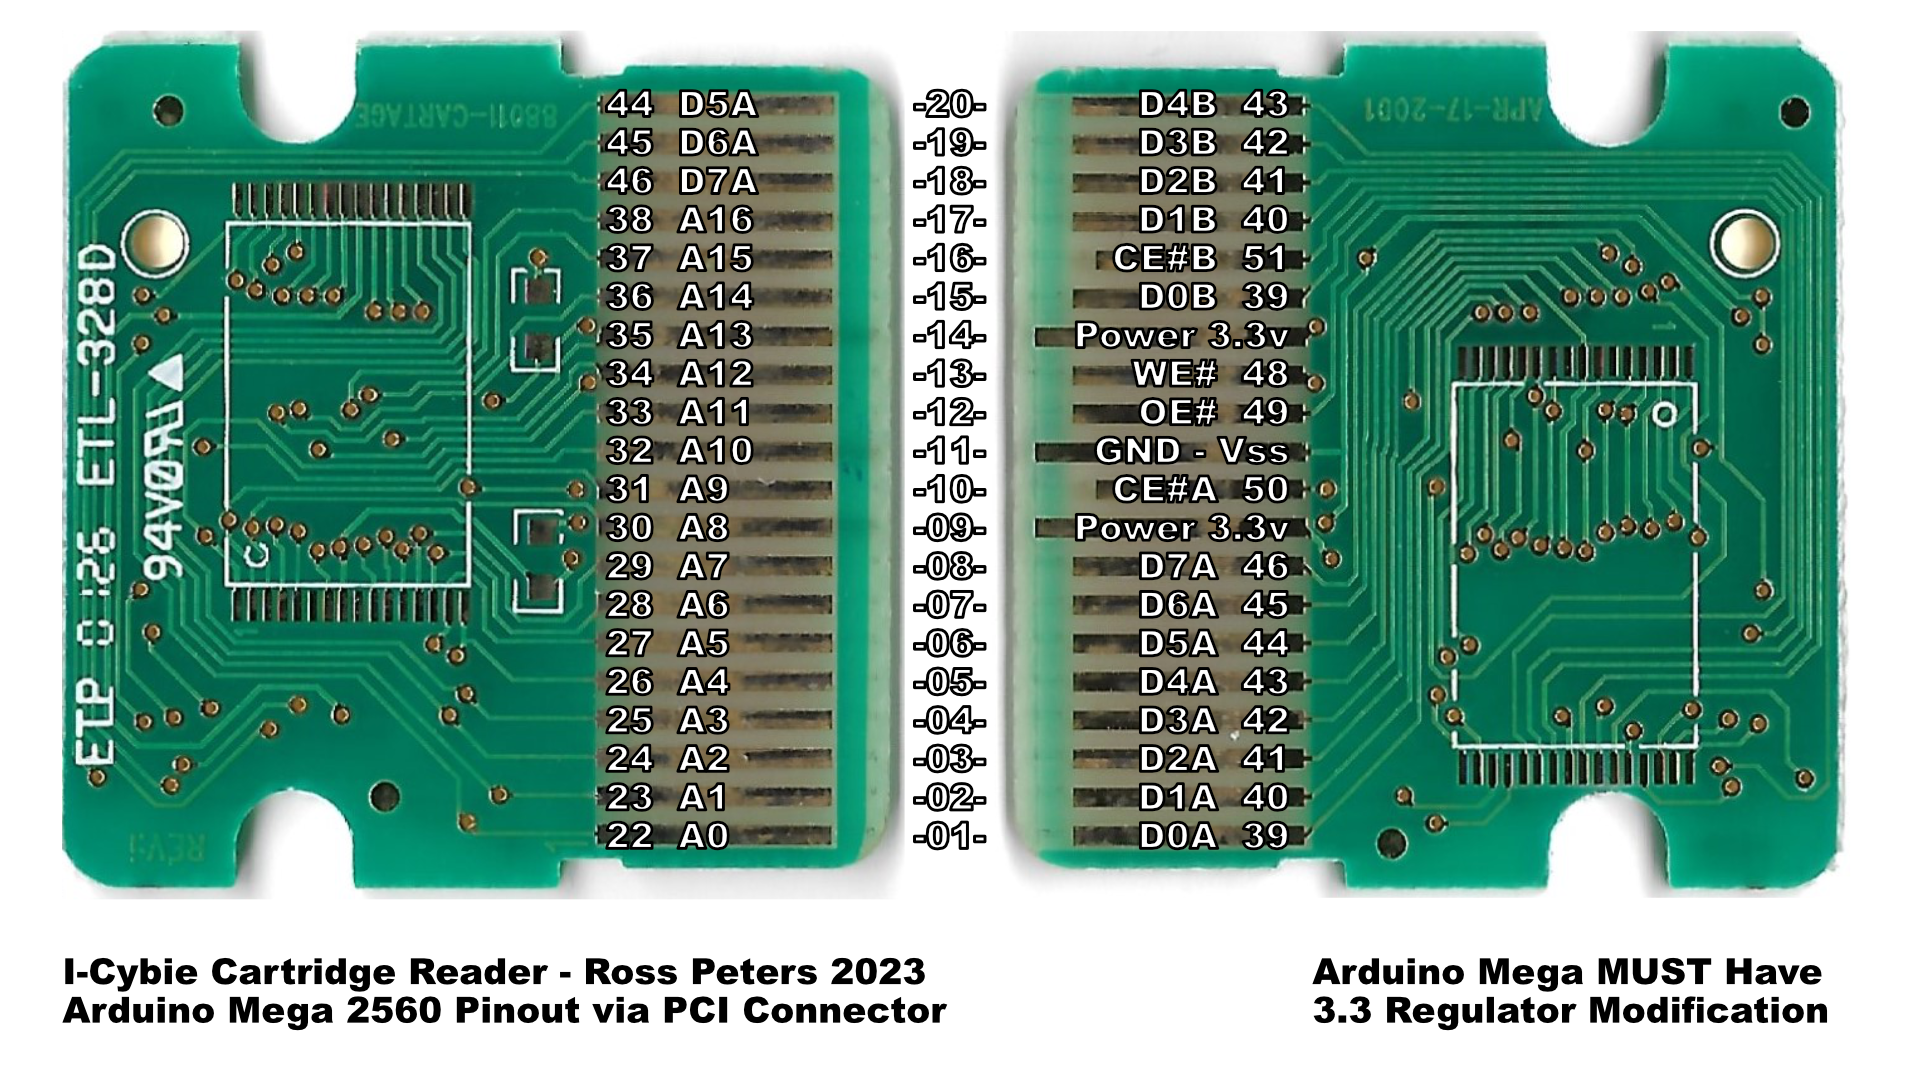
Once completed, you will need to add a cartridge slot to the Arduino. I was not able to source a reasonably priced 40-pin cartridge slot, but a PCI slot (NOT PCIE) has the same pitch of 1.27mm and works OK when cut to the right length. I used magnet wire to connect the PCI slot pins to a pin header for the Arduino. This is annoying to make, and I should have designed a PCB for this.
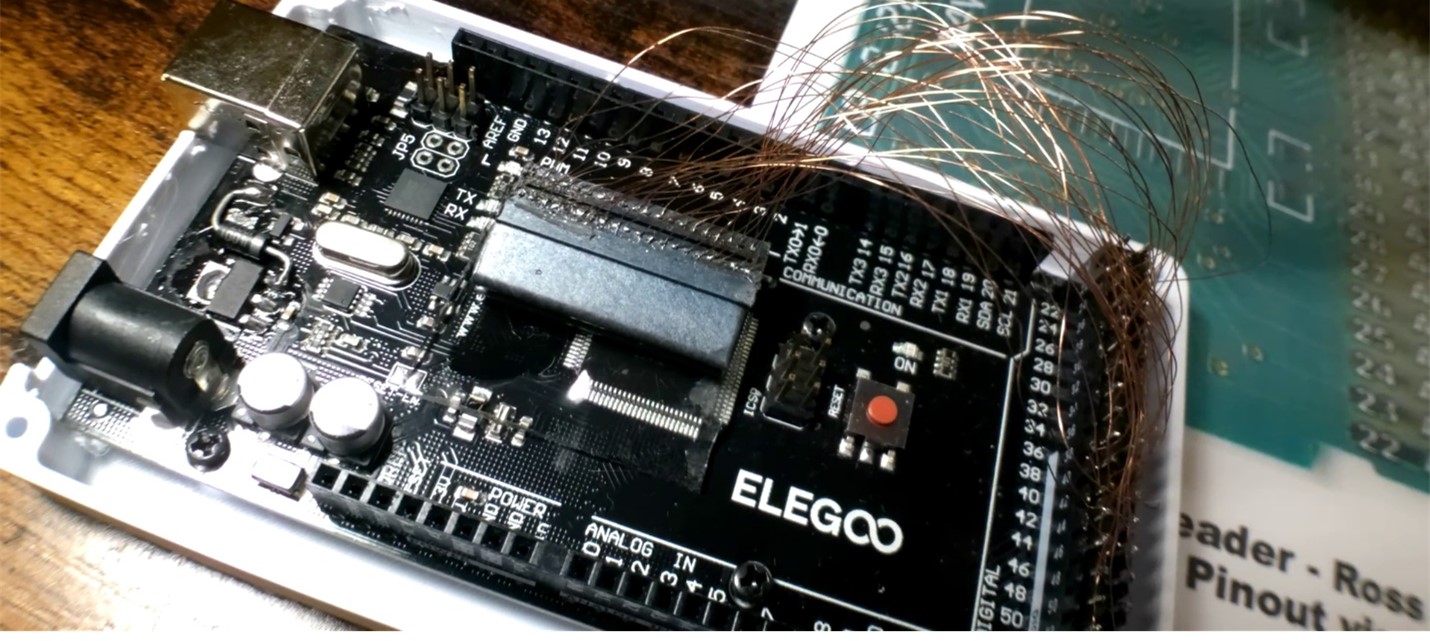
Be sure to never plug the cartridge in backwards, I don’t believe it has any reverse polarity protection. To remedy this, I included files for a 3D printable case with keyed slot for the cartridge. Because I didn’t have an off-the-shelf solution for the cartridge slot, you will need to mark and drill holes to attach the keyed connector depending on how it lines up with the case.
Using the Programmer
The programmer interface uses a Powershell script located in Tools\YICT\00_CybieDump.ps1
The script looks for the ROM files in the current folder, so it’s easiest to leave the script in the same folder as your ROMs. Because the script is not signed, you will need to open Powershell as Administrator at least once, and run the following command: Set-ExecutionPolicy Unrestricted
Please plug the programmer into the PC, and take note of which COM port it uses. The script will then prompt for Cartridge Side, COM Port, Read/Write, Filename of ROM, and verification status. I tried to make it as idiot-proof as possible to prevent bad flashes and frustration when playing with personalities.
You can also directly interface with the programmer using a serial terminal running at a baudrate of 57600 8n1. In this mode, the programmer will prompt for commands to read or write a cartridge and requires a terminal emulator capable of directly sending and receiving raw binary data files such as RealTerm.
Extra Personalities
You can use the YICT software to customize the i-Cybie’s behavior. The software is a bit clunky, but does the job. Z-Cybie V2 seems to be the golden standard that everything is based off of, but I didn’t care for some of the actions it used, particularly actions 177 and 182 seemed very hard on the robot or would fail to get up from.
You can also add custom sounds! The i-Cybie featured, for the time, quite a good DSP chip and can playback arbitrary sound samples once converted. Again, the tools included are a bit clunky, but you should be able to see how it works from the included files.
Using these tools, I created a new personality, Duke! The many quick one-liners from Duke Nukem wound up being a perfect match for the i-Cybie, and hearing the i-Cybie say “Damn, I’m good” when you pet him or do a trick and say “Bitchin” is just hilarious to me. He even says “hehe, what a mess” when he pees.
Source / Citations
Of course, I do not own the rights to most of the utilities included, so thanks goes out to the OG team behind YICT and all related tools. Thanks also goes to Luiz Cressoni for showing that a cartridge programmer was possible, I probably never would have attempted this if I had not seen his blog post.
- OG Cartridge Programmer Inspiration
- Code Examples for Flash Programming
- Arduino Source Code for Programmer
- Arduino 3.3v Modification
- YICT Tools and Documentation for I-Cybie
Download
Of course, here's what you came here for, a download link. Everything you should need is in a ZIP file, including CAD files for the case, photos of cartridge pinouts, Arduino code, and personality files for the i-Cybie. Also included are a few scattered readme files, and a PDF version of this article.
I provide no support or warranties for any of the software or designs included in this package. I am not responsible if you mess up your i-Cybie, and building your own programmer is entirely up to you.
Download: Pilotgeek's I-Cybie Cartridge Programmer
Custom Duke Personality: Duke202